A roof leak is a homeowner’s nightmare, causing not only visible damage but also potential structural issues if left unaddressed. Identifying and repairing a roof leak promptly is crucial to prevent further damage to your home. In this comprehensive guide, we will explore the signs of a roof leak, guide you through the process of identifying its source, and provide step-by-step instructions on repairing a roof leak.
Signs of a Roof Leak:
Before diving into the identification and repair process, it’s essential to recognize the signs that may indicate a roof leak:
- Water Stains on Ceilings and Walls:
- Discolored spots or water stains on ceilings and walls are clear indicators of water intrusion from above.
- Dripping or Puddles:
- If you notice water dripping from the ceiling or puddles forming on the floor during rain, it’s a sign of an active roof leak.
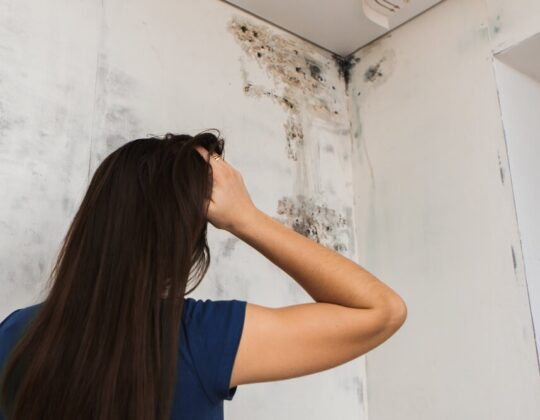
- Mold or Mildew Growth:
- The presence of mold or mildew on ceilings or in attic spaces can signal a chronic roof leak.
- Peeling Paint or Wallpaper:
- Moisture from a roof leak can cause paint or wallpaper to peel or bubble.
- Musty Odors:
- A persistent musty or moldy smell in certain areas of the house, especially in the attic, can indicate hidden water damage.
- Damaged Roofing Materials:
- Visually inspect your roof for damaged or missing shingles, cracked tiles, or deteriorating roofing materials.
- Water in Attic or Crawlspace:
- A wet attic or crawlspace, especially during dry weather, may indicate an ongoing roof leak.
Identifying the Source of the Roof Leak:
Once you’ve identified signs of a roof leak, the next step is to pinpoint the source. Here’s a systematic approach to identify where the leak is originating:
1. Inspect the Attic:
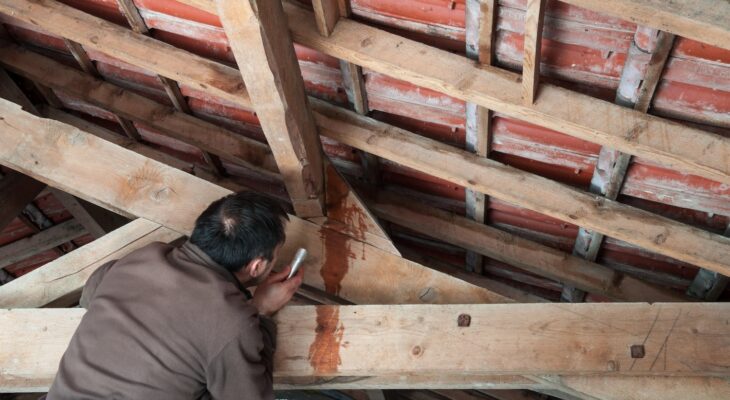
- Start by examining the attic during daylight hours. Look for any signs of water staining or wet spots on the underside of the roof deck.
2. Check for Daylight:
- On a sunny day, inspect the attic for any areas where daylight is visible. This can indicate gaps or openings where water may enter.
3. Examine Roof Penetrations:
- Inspect areas where the roof is penetrated, such as vents, chimneys, skylights, and plumbing vents. Check for gaps or damaged flashing around these features.
4. Investigate Flashing:
- Flashing around chimneys, vents, and roof joints is a common source of leaks. Look for damaged or deteriorated flashing that may need replacement.
5. Inspect Roof Valleys:
- Roof valleys, where two roof planes meet, are vulnerable to leaks. Examine these areas for damaged shingles or deteriorated flashing.
6. Look for Damaged Shingles or Tiles:
- Visually inspect the entire roof for damaged or missing shingles or tiles. Pay attention to areas where water may pool, such as low-slope sections.
7. Check Gutters and Downspouts:
- Clogged or damaged gutters and downspouts can contribute to roof leaks. Ensure they are clear of debris and draining properly.
8. Assess the Roof Pitch:
- Low-pitched roofs may be more susceptible to leaks. Evaluate the pitch and consider adding a waterproof membrane or using specialized roofing materials.
9. Consider Skylights and Ventilation:
- Skylights and ventilation systems can be potential points of entry for water. Inspect the seals and flashing around these features.
10. Utilize Water Testing: – Enlist the help of a partner to simulate rainfall with a hose while you observe potential leak areas in the attic. This can help identify the precise entry point.
Repairing a Roof Leak:
Once you’ve identified the source of the roof leak, it’s time to undertake the necessary repairs. Here’s a step-by-step guide to fixing a roof leak:
1. Safety First:
- Prioritize safety by using proper protective gear, such as gloves and non-slip footwear, when working on the roof.
2. Gather Materials:
- Collect the necessary materials for repairs, including roofing cement, replacement shingles or tiles, flashing, sealant, and a pry bar.
3. Clear Debris:
- Remove any debris, leaves, or branches from the roof surface. Clearing the area will make it easier to identify and address the source of the leak.
4. Replace Damaged Shingles or Tiles:
- If the leak is attributed to damaged or missing shingles or tiles, carefully remove the defective pieces using a pry bar.
- Replace with new shingles or tiles of the same type and color. Secure them in place using roofing nails.
5. Repair Flashing:
- If the flashing is damaged or deteriorated, remove the affected section.
- Install new flashing, ensuring it is properly sealed and aligned with the surrounding roofing materials.
6. Seal Roof Penetrations:
- Apply roofing cement around roof penetrations such as vents, chimneys, and plumbing vents.
- Ensure a watertight seal to prevent water intrusion.
7. Install a Roof Patch:
- For larger damaged areas, use a roof patch or roofing membrane to cover and seal the affected region.
- Follow manufacturer instructions for proper application.
8. Check Skylight Seals:
- Inspect the seals around skylights and reseal if necessary using appropriate sealant.
- Ensure a secure and watertight connection between the skylight frame and the roof.
9. Address Valley Leaks:
- If the roof valleys are a source of the leak, install a metal valley flashing to channel water away and prevent pooling.
10. Clean and Maintain Gutters: – Ensure gutters and downspouts are clean and free of debris. Consider installing gutter guards to prevent future clogs.
11. Professional Assistance: – If the roof leak is extensive or if you are uncomfortable with the repair process, consider seeking professional help. – Roofing professionals can provide expert assessment and perform repairs with precision.
12. Roof Replacement: – In cases of severe damage or an aging roof, it may be more practical to consider a roof replacement. – Consult with a roofing professional to determine the best course of action.
13. Regular Inspections: – Implement a regular roof maintenance schedule to identify and address potential issues before they escalate. – Inspect the roof annually, especially after severe weather events.
Conclusion: Identifying and repairing a roof leak requires a systematic and cautious approach. By recognizing the signs, thoroughly inspecting the roof, and executing precise repairs, you can safeguard your home from water damage. Whether you choose to tackle the repairs yourself or enlist the help of professionals, the key is prompt action to prevent further deterioration. With the right knowledge and tools, you can maintain a watertight roof that protects your home and ensures its longevity.


